
120000PA Mini Car Vacuum Cleaner Portable Wireless Hand held Cleaner for Home Appliance Powerful Cleaning Machine Car Cleaner
September 26, 2023
Multifunctional Smart Watch Men Women Bluetooth Connected Phone Music Fitness Sports Bracelet Sleep Monitor Y68 Smartwatch D20
September 26, 2023")
")
")

New Adjustable Temperature Electric Soldering Iron 220V 110V 60W Welding Solder Rework Station Heat Pencil Tips Repair Tools
The ability to adjust the temperature is a crucial feature for soldering, as different soldering tasks require different temperature settings. This soldering iron likely has a temperature control knob or digital display that allows you to set the temperature according to your needs. This flexibility makes it suitable for various soldering applications, from delicate electronics work to larger soldering tasks.
$24.14
Voltage: The soldering iron you mentioned is designed to work with both 220V and 110V power sources, which makes it versatile and suitable for use in different regions with varying voltage standards. Make sure to select the appropriate voltage setting based on your local power supply.
Power Rating: The soldering iron is rated at 60W, which indicates the amount of power it consumes while in use. This wattage is suitable for a wide range of soldering tasks, from small electronics to larger components.
Adjustable Temperature: One of the key features of this soldering iron is its adjustable temperature control. This allows you to set the soldering iron to the specific temperature required for your soldering job. Different soldering tasks may require different temperatures, so having this flexibility is essential for achieving quality solder joints.
Soldering Tips: Soldering irons typically come with interchangeable soldering tips. These tips can vary in size and shape to suit different soldering applications. Having a variety of tips can be beneficial for working on various projects.
Rework Station: Some soldering irons come with a base or station that holds the iron when it’s not in use. This station may include a sponge or brass wire cleaner for maintaining the cleanliness of the soldering tip, which is crucial for good soldering performance.
Repair and DIY: This soldering iron is versatile and can be used for various purposes, including electronics repair, circuit board soldering, wiring tasks, and DIY projects where soldering is required.
Safety: When using a soldering iron, it’s essential to follow safety precautions. Use it in a well-ventilated area, avoid touching the hot tip, and keep it away from flammable materials. Also, unplug the soldering iron when not in use to prevent accidents.
Maintenance: Regularly clean and tin the soldering tip to ensure it remains in good condition. Replace tips when they become worn or damaged.
Before using this soldering iron, it’s important to read the manufacturer’s instructions and safety guidelines provided with the product. Additionally, consider using appropriate safety gear, such as safety glasses and heat-resistant gloves, when soldering to protect yourself from potential hazards.
Soldering Technique: Proper soldering technique is crucial for creating strong and reliable connections. Here are the basic steps:
a. Clean the soldering tip: Use a wet sponge or brass wire cleaner to clean the tip before and during soldering. A clean tip transfers heat more effectively.
b. Heat the joint: Apply the soldering iron tip to the joint you want to solder. Heat the joint, not the solder itself.
c. Apply solder: Once the joint reaches the correct temperature, touch the solder to the joint, not the iron. The solder should melt and flow evenly over the joint.
d. Remove the solder: After applying solder, remove the solder wire first, and then remove the soldering iron. This ensures the solder solidifies properly.
Temperature Settings: Adjust the soldering iron’s temperature based on the type of solder and components you’re working with. Lead-free solder, for example, typically requires higher temperatures than lead-based solder. Refer to the solder manufacturer’s recommendations for temperature settings.
Tinning: Tinning involves coating the soldering tip with a thin layer of solder. This helps improve heat transfer and prevents oxidation of the tip. Always tin your soldering iron tip before and after each use.
Solder Types: There are various types of solder available, including lead-based and lead-free solder. Make sure you use the appropriate solder for your specific application and adhere to safety guidelines when handling lead-based solder.
Ventilation: Soldering produces fumes that can be harmful if inhaled. Work in a well-ventilated area or consider using a fume extractor or soldering fume fan to remove any toxic fumes.
Safety Gear: Wear safety glasses to protect your eyes from any splattering solder or fumes. Heat-resistant gloves can also be useful for handling hot components and soldering iron.
Practice: Soldering can be a skill that takes time to master. Practice on scrap materials before working on critical projects. This will help you improve your technique and confidence.
Storage: Properly store your soldering iron when not in use. Turn it off, allow it to cool down, and place it in its holder or base. Secure the power cord to prevent tripping hazards.
Troubleshooting: If you encounter soldering issues like cold solder joints, solder bridges, or poor connections, consult online resources, tutorials, or seek advice from experienced soldering enthusiasts or professionals.
Safety Shut-off: Some advanced soldering irons come with safety features like an automatic shut-off timer. If available, consider using this feature to prevent overheating and save energy.
Desoldering: In addition to soldering, you may need to desolder components at times. For this, you can use a desoldering pump (solder sucker) or desoldering wick (solder braid). These tools help remove excess solder or unsolder components for repairs.
Component Sensitivity: Some electronic components, especially heat-sensitive ones like integrated circuits (ICs), can be damaged by excessive heat. When soldering near sensitive components, use heat sinks or heat-resistant materials to protect them.
Solder Flux: Solder flux helps in the soldering process by promoting better solder flow and preventing oxidation. Some solder wires come with a flux core, but you can also use a separate flux pen or liquid flux for more challenging soldering tasks.
Soldering Iron Stand: A soldering iron stand or holder is essential for keeping the iron in a safe and stable position when not in use. It prevents accidental burns and minimizes the risk of fires.
Ergonomics: Pay attention to your posture and ergonomics when soldering. Maintain a comfortable working height and use proper lighting to avoid strain on your eyes and neck.
Soldering Mat: Consider using a heat-resistant soldering mat or work surface to protect your workspace from burns and solder splatter.
Soldering Iron Tip Maintenance: Regularly clean and re-tin the soldering iron tip to keep it in good condition. When the tip becomes worn or damaged beyond repair, replace it with a compatible tip.
Grounding: If you’re working on sensitive electronic equipment, ensure that both you and your soldering iron are properly grounded to prevent static discharge, which can damage components.
Practice Soldering Techniques: Practice various soldering techniques, such as through-hole soldering, surface-mount soldering, and drag soldering, to become proficient in different soldering scenarios.
Temperature Recovery: After soldering, allow the soldering iron to come back up to temperature before starting the next joint. This ensures consistent soldering quality.
Patience: Soldering can be a delicate and precise process. Don’t rush, and take your time to achieve clean and reliable solder joints.
Safety First: Always prioritize safety. Avoid distractions when soldering, work in a clutter-free environment, and keep flammable materials away from your workspace.
Learning Resources: There are plenty of online tutorials, videos, and soldering courses available that can help you improve your soldering skills. Consider seeking out these resources to enhance your knowledge and techniques.
Related products
-
XSDTS Tuya Wifi Digital Electronic Smart Door Lock With Biometric Camera Fingerprint Smart Card Password Key Unlock
$96.04Product arrived fast, well packed and very well finished. I have installed and it is working perfectly, I hope it will continue for a long time. it was worth the investment and recommend the seller.
-
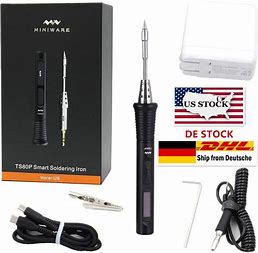
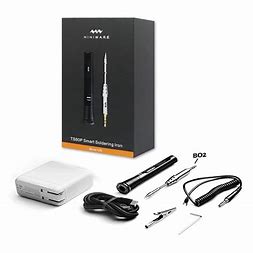
Original TS80 TS80P Electronic Soldering Iron Adjustable Temperature Programmable Portable Digital Display Tin Soldering Tools
$49.99TS80P portable digital display iron supports 9V/2A QC3.0 standard and DC12V 2.5a PD2.0 standard, ensuring high power output of up to 30W. It is also equipped with USB Type C power interface, which can directly charge bank or smart phone through power supply
2) Upgraded soldering handle, bell-shaped fasteners and self-locking design allow you to easily install the soldering head without installing screws.
3) Embedded smart MCU processor chip allows you to update firmware or parameter Settings through your computer, and supports sleep mode, automatic shutdown and port protection.
4) Internal heat design, accurate temperature control, fast temperature rise, only 8 seconds to reach the set temperature
5) Clear display of OLED screen parameters, two buttons to adjust the output temperature (100-400 degrees Celsius range), easy to change parameters.
6) Compact pen shape, CNC machined aluminum alloy housing and ergonomic design make it comfortable to hold and carry, ideal for field repair or everyday welding projects.
-
QCY T20 TWS Wireless Earphones Bluetooth 5.3 Earbuds 68ms Low Latency 13mm Driver HIFI Headphones 4 Mics+ENC HD Call Headsets
$16.71TWS Wireless Earphones: TWS earphones are a type of wireless earbuds that come in pairs, with one earbud for each ear. They are designed to provide a truly wireless listening experience, meaning there are no cords or cables connecting the two earbuds. TWS.


Reviews
There are no reviews yet.